How to create a CI/CD pipeline for a React app (2nd part)
In the 1st part of the tutorial for creating a CI/CD pipeline for a React app, we saw how to create docker containers for dev, testing and production enviroments. In this 2nd part we will see how to integrate a CI service like Travis CI and deploy our app to AWS.
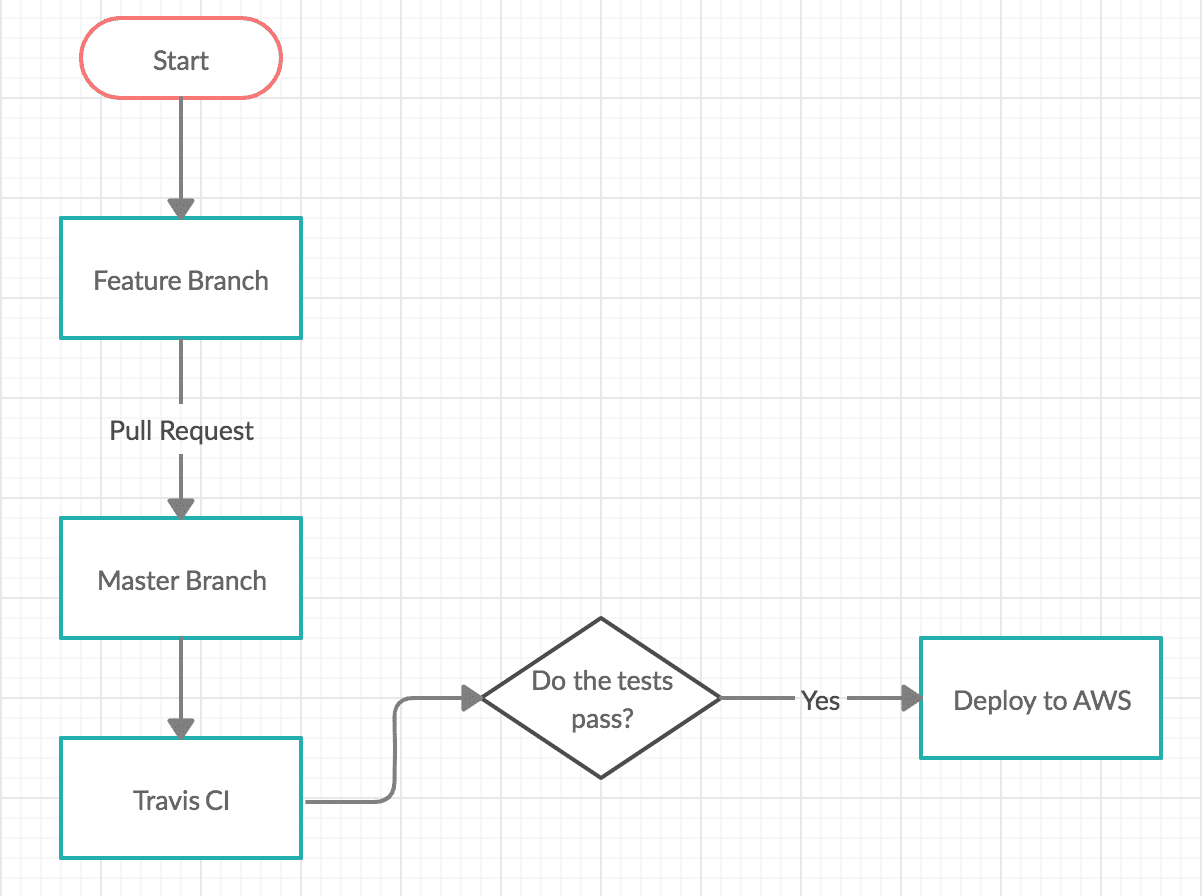
Reminder on how our final pipeline will look like:
I assume that you already have setup a Github repo and you have pushed your code there. It is important that the docker related files are also being pushed to the repo.
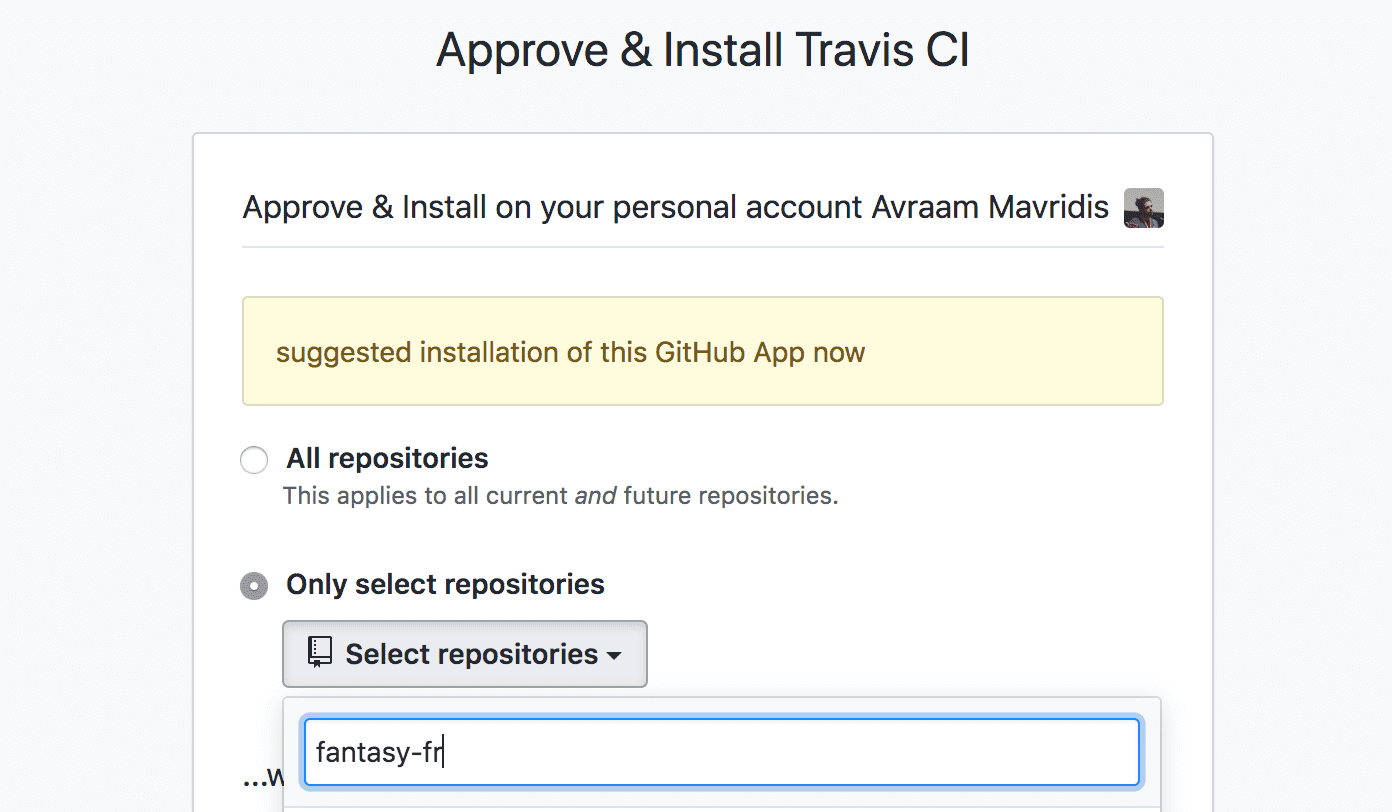
You can go then to Travis CI and give it access to your Github repo
Allow Travis to access your github repos:

And enable one or more repos, so whenever something is pushed there Travis CI will trigger its own process (that we will define):
To tell Travis CI exactly what to do whenever we push code to our repo, we need
to create a .travis.yml in the root of our project, where we can define our
instructions towards travis.
# We tell Travis that we need super user access
sudo: required
# We tell Travis to install docker
services:
- docker
# Commands that need to be executed before we run the tests
before_install:
# build the container and tag it so we can refer to it later
- docker build -t test_container -f Dockerfile.dev .
script:
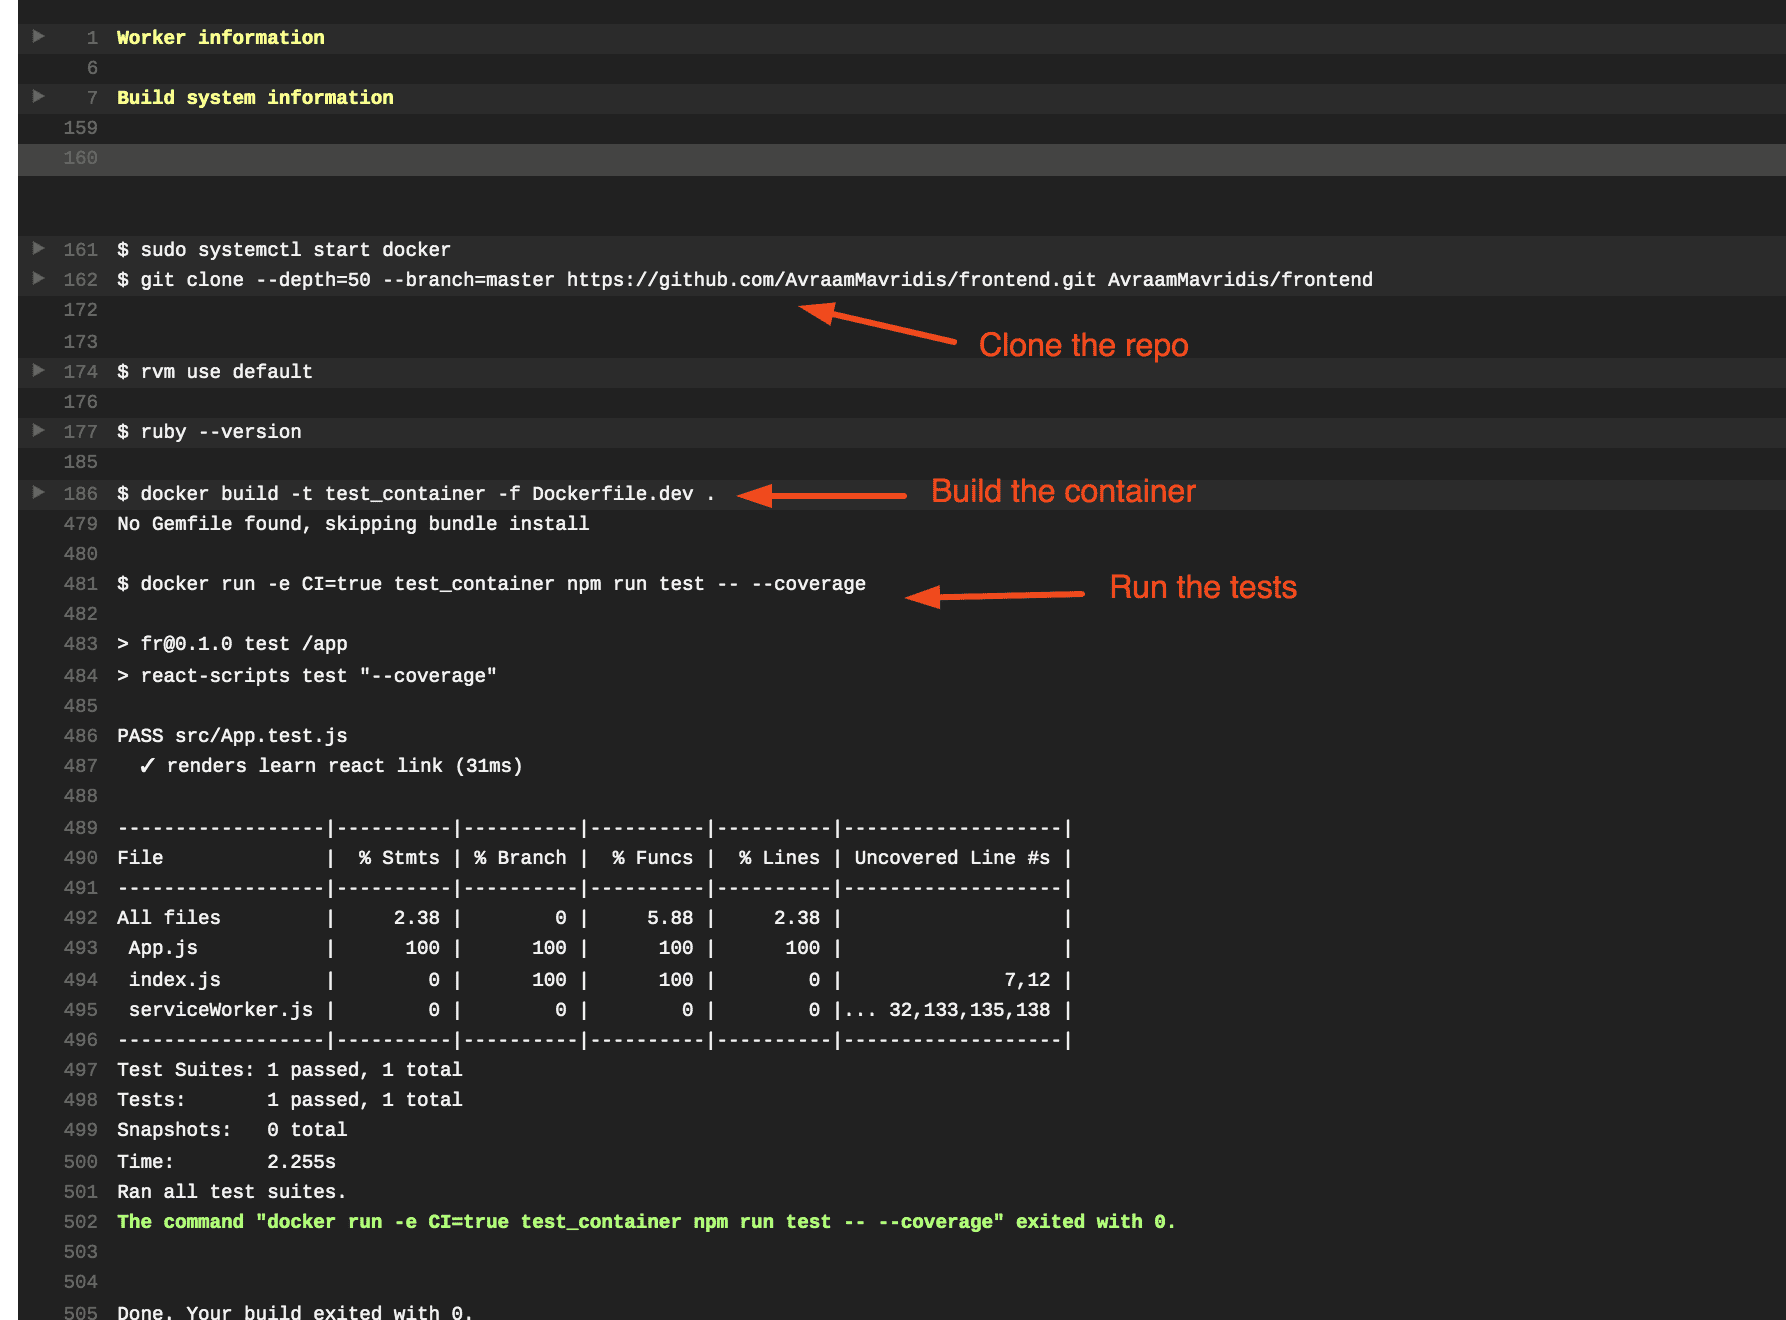
- docker run -e CI=true test_container npm run test -- --coverageIf we do everything succefully and push to our repo, Travis CI will clone the repo and execute the commands we described in the yaml file
Deploy to AWS
To deploy on the AWS we need to specify in our yaml file a few more things, the provider, the region where we want to deploy, the application and enviroment names, and the bucket name where our code will be saved. We also say to Travis to deploy only when we push to master.
# We tell Travis that we need super user access
sudo: required
# We tell Travis to install docker
services:
- docker
# Commands that need to be executed before we run the tests
before_install:
# build the container and tag it so we can refer to it later
- docker build -t test_container -f Dockerfile.dev .
script:
- docker run -e CI=true test_container npm run test -- --coverage
deploy:
provider: elasticbeanstalk
region: "us-east-2"
app: "frontend"
env: "Frontend-env"
bucket_name: "elasticbeanstalk-us-east-2-601430843364"
on:
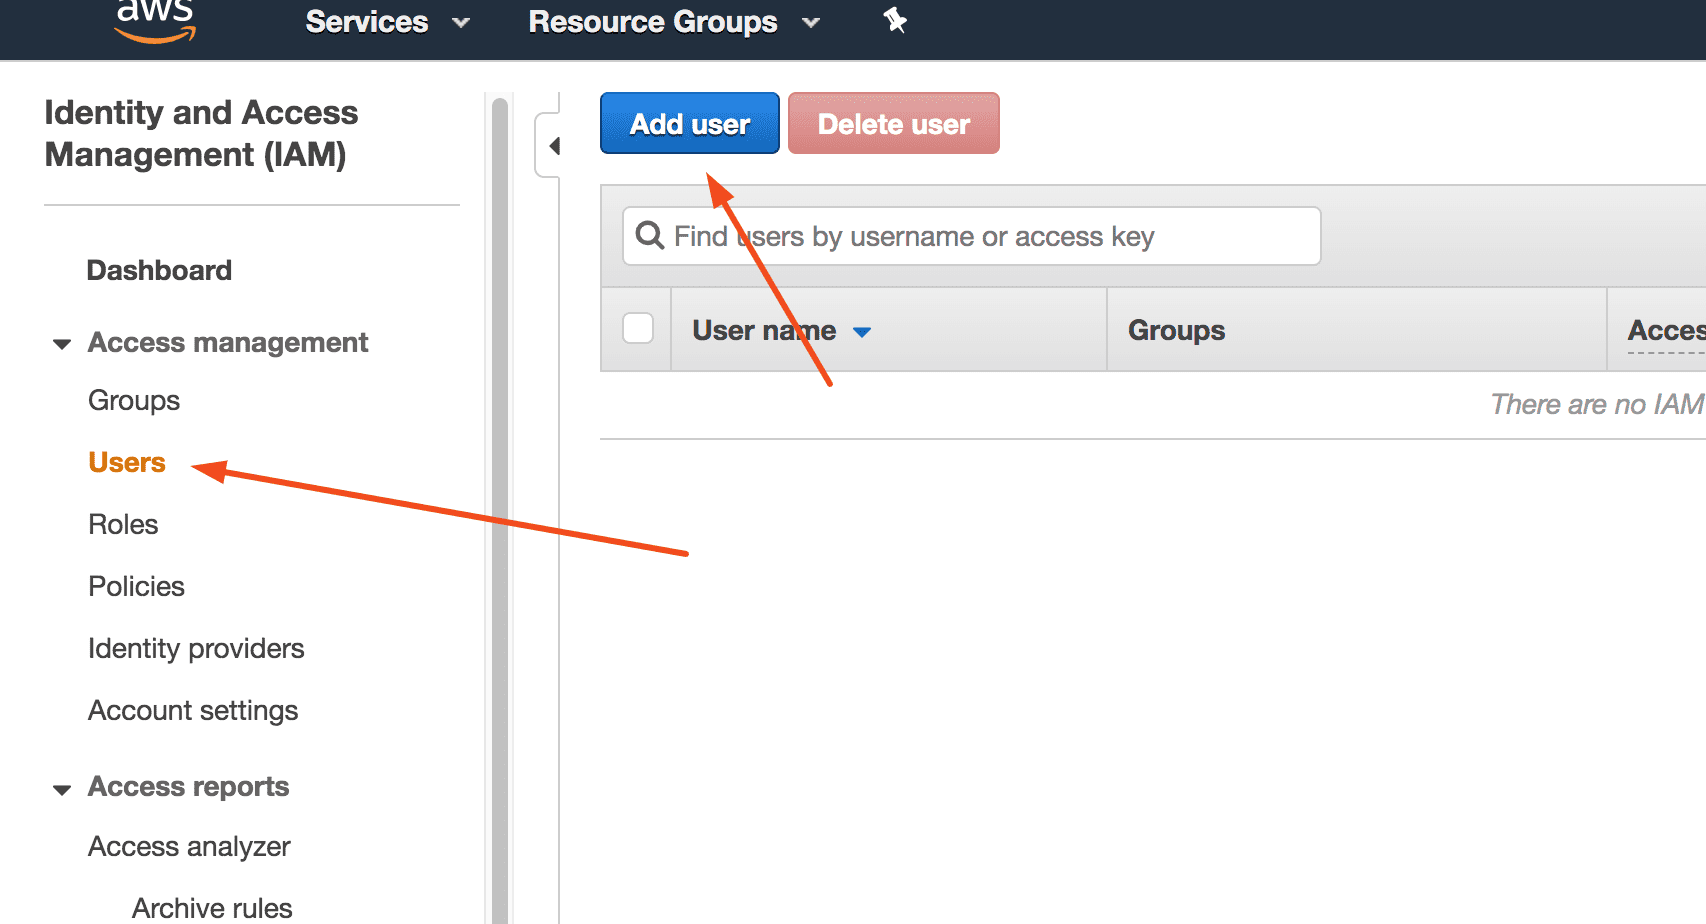
branch: masterTo be able to deploy we also need to do a few more things related to security. We will create a new user, and give it permissions to deploy and generate access and secret keys through the IAM service of AWS.
After following that steps AWS will create ACCESSKEY and SECRETKEY, you can download and save these somewhere safely. We don’t want to hard-code these values in our yaml file, we will use the Enviroment Variables feature of Travis CI and create 2 new variables and save them there.

Then in our yaml file we will tell travis where to look for these variables.
# We tell Travis that we need super user access
sudo: required
# We tell Travis to install docker
services:
- docker
# Commands that need to be executed before we run the tests
before_install:
# build the container and tag it so we can refer to it later
- docker build -t test_container -f Dockerfile.dev .
script:
- docker run -e CI=true test_container npm run test -- --coverage
deploy:
provider: elasticbeanstalk
region: "us-east-2"
app: "frontend"
env: "Frontend-env"
bucket_name: "elasticbeanstalk-us-east-2-601430843364"
on:
branch: master
# Deploy AWS Keys
access_key_id: "$AWS_ACCESS_KEY"
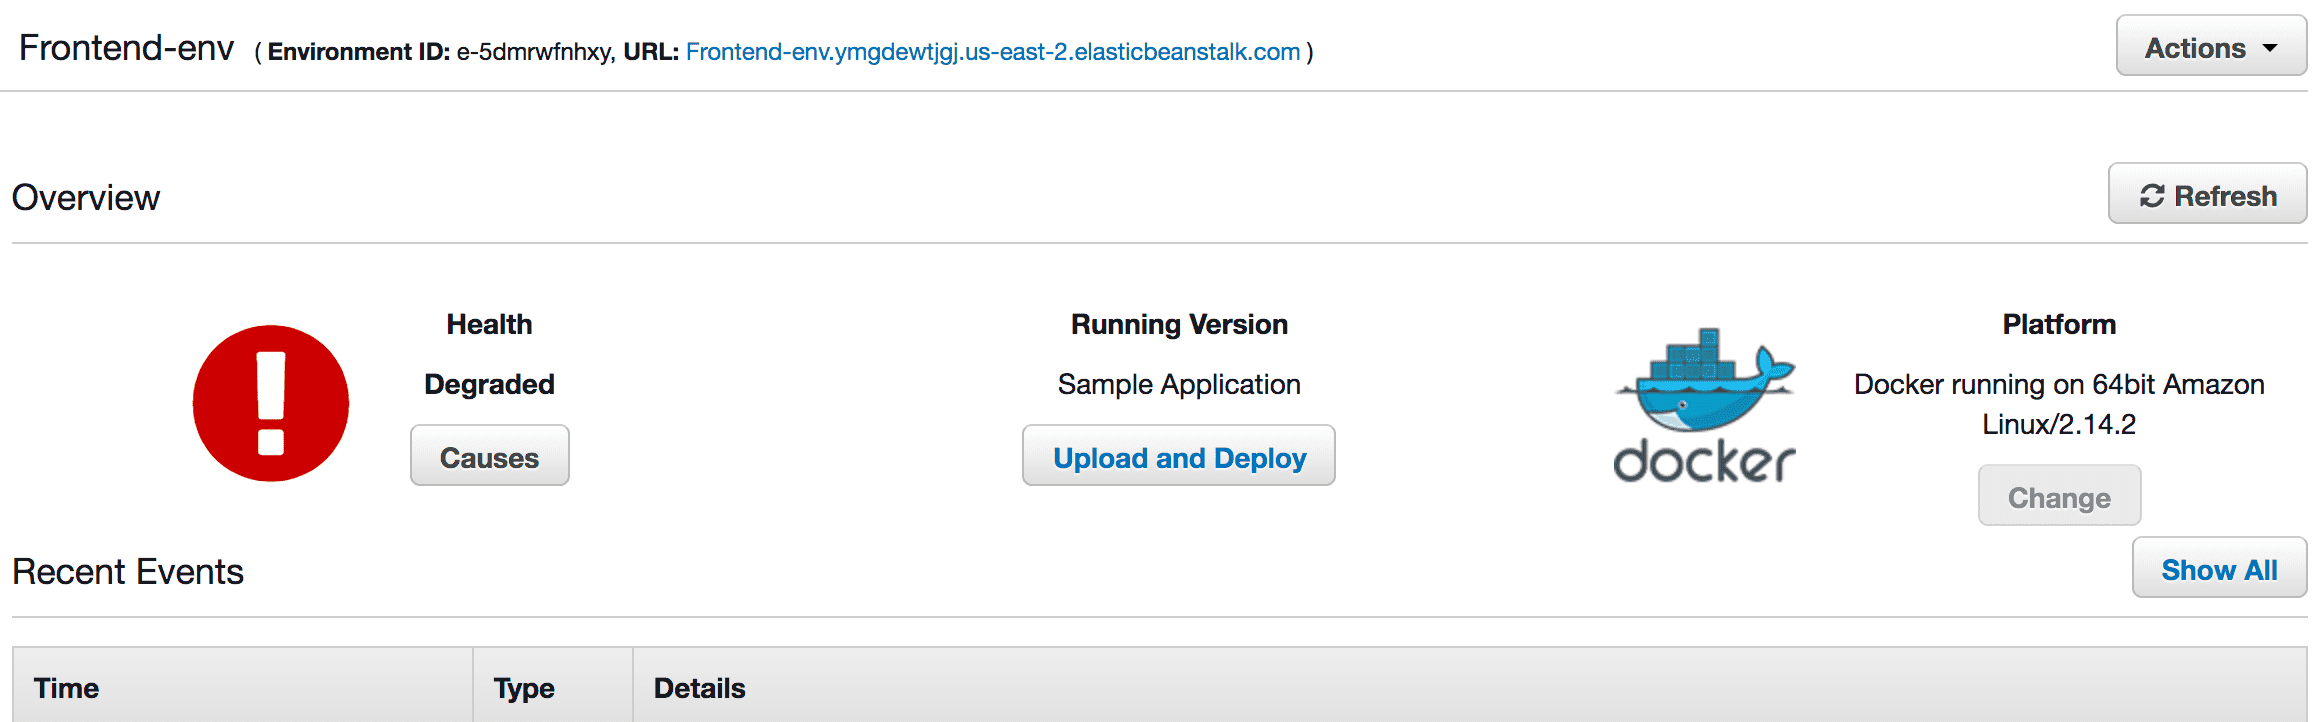
secret_access_key: "$AWS_SECRET_KEY" If we do these steps, and push to the master, our application should be succefully deployed, but there is a problem, our container is not reachable from the host of AWS.
To fix that we need to expose the port of nginx, the port 80, so in our Dockerfile we add this command.
# Build step
FROM node:alpine as builder
WORKDIR '/app/'
COPY package.json .
RUN npm install
COPY . .
## The outcome will go to /app/build
RUN ["npm", "run", "build"]
FROM nginx
EXPOSE 80
COPY /app/build /usr/share/nginx/htmlAnd now the health check of Elasticbeanstalk should be fine and our application reachable from the internet.
